

Do you want to track the time taken by a user to complete an action? Wanted to track the time interval between two user actions? Then it will be the simple and efficient step by step guide for you. No cookie used.
Steps to follow
Step 1:
Paste the following tag in a custom HTML tag and fire it when the conversion journey initiated by users. It can be viewing a page, starts filling a form, clicks on a button, etc.
<script>
var d = new Date();
window.dataLayer = window.dataLayer || [];
window.dataLayer.push({
‘EntryTimestamp’: d.getTime()
});
</script>
Above code will push the starting timestamp to data layer.
Step 2:
Create a data layer variable to hold the starting timestamp value pushed to the data layer.

Step 3:
Push the following code to the data layer when the conversion action get completed. It can be a form submission, thank you page view, button click, etc.
<script>
var d = new Date();
var n = d.getTime();
var diff = ( n – {{Entry Timestamp}} );
window.dataLayer = window.dataLayer || [];
window.dataLayer.push({
‘timeTaken’: diff,
‘event’: ‘timeTracker’
});
</script>
Above code will push an event to data layer with duration in milliseconds.
Step 4:
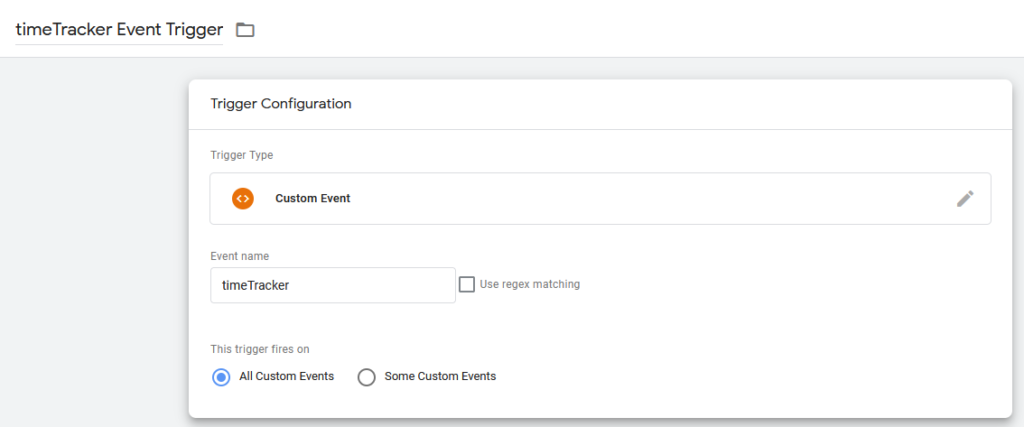
Setup the UA Timing tag and send the duration details to UA using the custom event trigger.
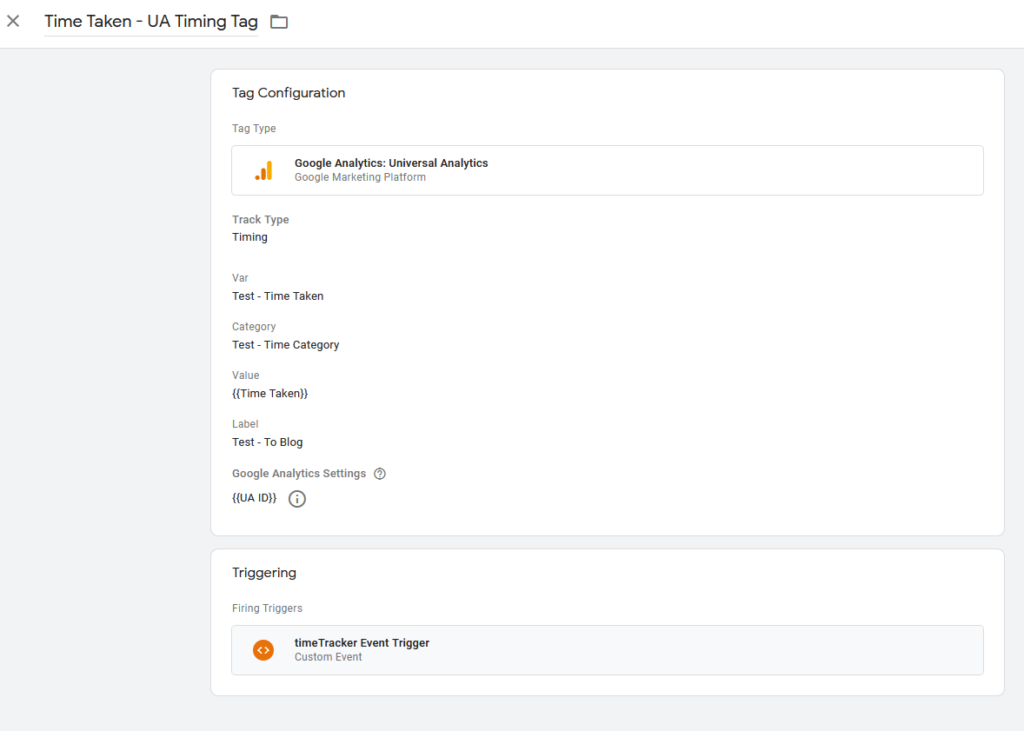
Make sure to change the Var, Category and Label field values.
Step 5:
Send some test data to UA and wait 30 minutes. Then you can see the user timings numbers UA.

Happy experimenting…!